Run Coding Copilot in VSCode with Intel GPU#
Continue is a coding copilot extension in Microsoft Visual Studio Code; by integrating it with ipex-llm, users can now easily leverage local LLMs running on Intel GPU (e.g., local PC with iGPU, discrete GPU such as Arc, Flex and Max) for code explanation, code generation/completion, etc.
Below is a demo of using Continue with CodeQWen1.5-7B running on Intel A770 GPU. This demo illustrates how a programmer used Continue to find a solution for the Kaggle’s Titanic challenge, which involves asking Continue to complete the code for model fitting, evaluation, hyper parameter tuning, feature engineering, and explain generated code.
Quickstart#
This guide walks you through setting up and running Continue within Visual Studio Code, empowered by local large language models served via Ollama with ipex-llm optimizations.
1. Install and Run Ollama Serve#
Visit Run Ollama with IPEX-LLM on Intel GPU, and follow the steps 1) Install IPEX-LLM for Ollama, 2) Initialize Ollama 3) Run Ollama Serve to install, init and start the Ollama Service.
Important
If the Continue plugin is not installed on the same machine where Ollama is running (which means Continue needs to connect to a remote Ollama service), you must configure the Ollama service to accept connections from any IP address. To achieve this, set or export the environment variable OLLAMA_HOST=0.0.0.0 before executing the command ollama serve.
Tip
If your local LLM is running on Intel Arc™ A-Series Graphics with Linux OS (Kernel 6.2), it is recommended to additionaly set the following environment variable for optimal performance before executing ollama serve:
export SYCL_PI_LEVEL_ZERO_USE_IMMEDIATE_COMMANDLISTS=1
2. Pull and Prepare the Model#
2.1 Pull Model#
Now we need to pull a model for coding. Here we use CodeQWen1.5-7B model as an example. Open a new terminal window, run the following command to pull codeqwen:latest.
export no_proxy=localhost,127.0.0.1
./ollama pull codeqwen:latest
Please run the following command in Anaconda Prompt.
set no_proxy=localhost,127.0.0.1
ollama pull codeqwen:latest
See also
Besides CodeQWen, there are other coding models you might want to explore, such as Magicoder, Wizardcoder, Codellama, Codegemma, Starcoder, Starcoder2, and etc. You can find these models in the Ollama model library. Simply search for the model, pull it in a similar manner, and give it a try.
2.2 Prepare the Model and Pre-load#
To make Continue run more smoothly with Ollama, we will create a new model in Ollama using the original model with an adjusted num_ctx parameter of 4096.
Start by creating a file named Modelfile with the following content:
FROM codeqwen:latest
PARAMETER num_ctx 4096
Next, use the following commands in the terminal (Linux) or Anaconda Prompt (Windows) to create a new model in Ollama named codeqwen:latest-continue:
ollama create codeqwen:latest-continue -f Modelfile
After creation, run ollama list to see codeqwen:latest-continue in the list of models.
Finally, preload the new model by executing the following command in a new terminal (Linux) or Anaconda prompt (Windows):
ollama run codeqwen:latest-continue
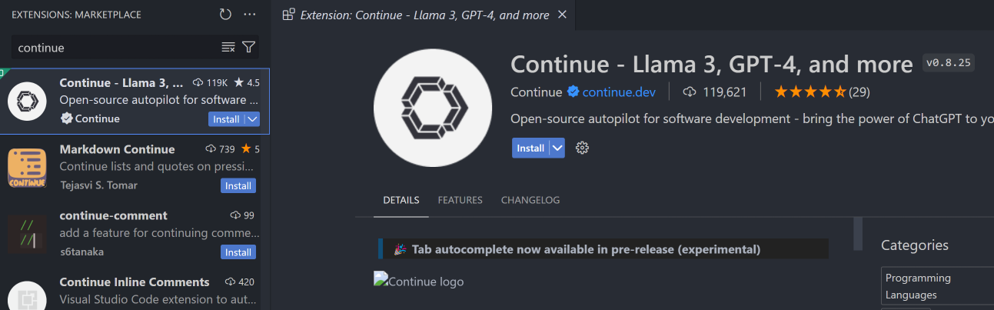
3. Install Continue Extension#
Search for Continue in the VSCode Extensions Marketplace and install it just like any other extension.
Once installed, the Continue icon will appear on the left sidebar. You can drag and drop the icon to the right sidebar for easy access to the Continue view.
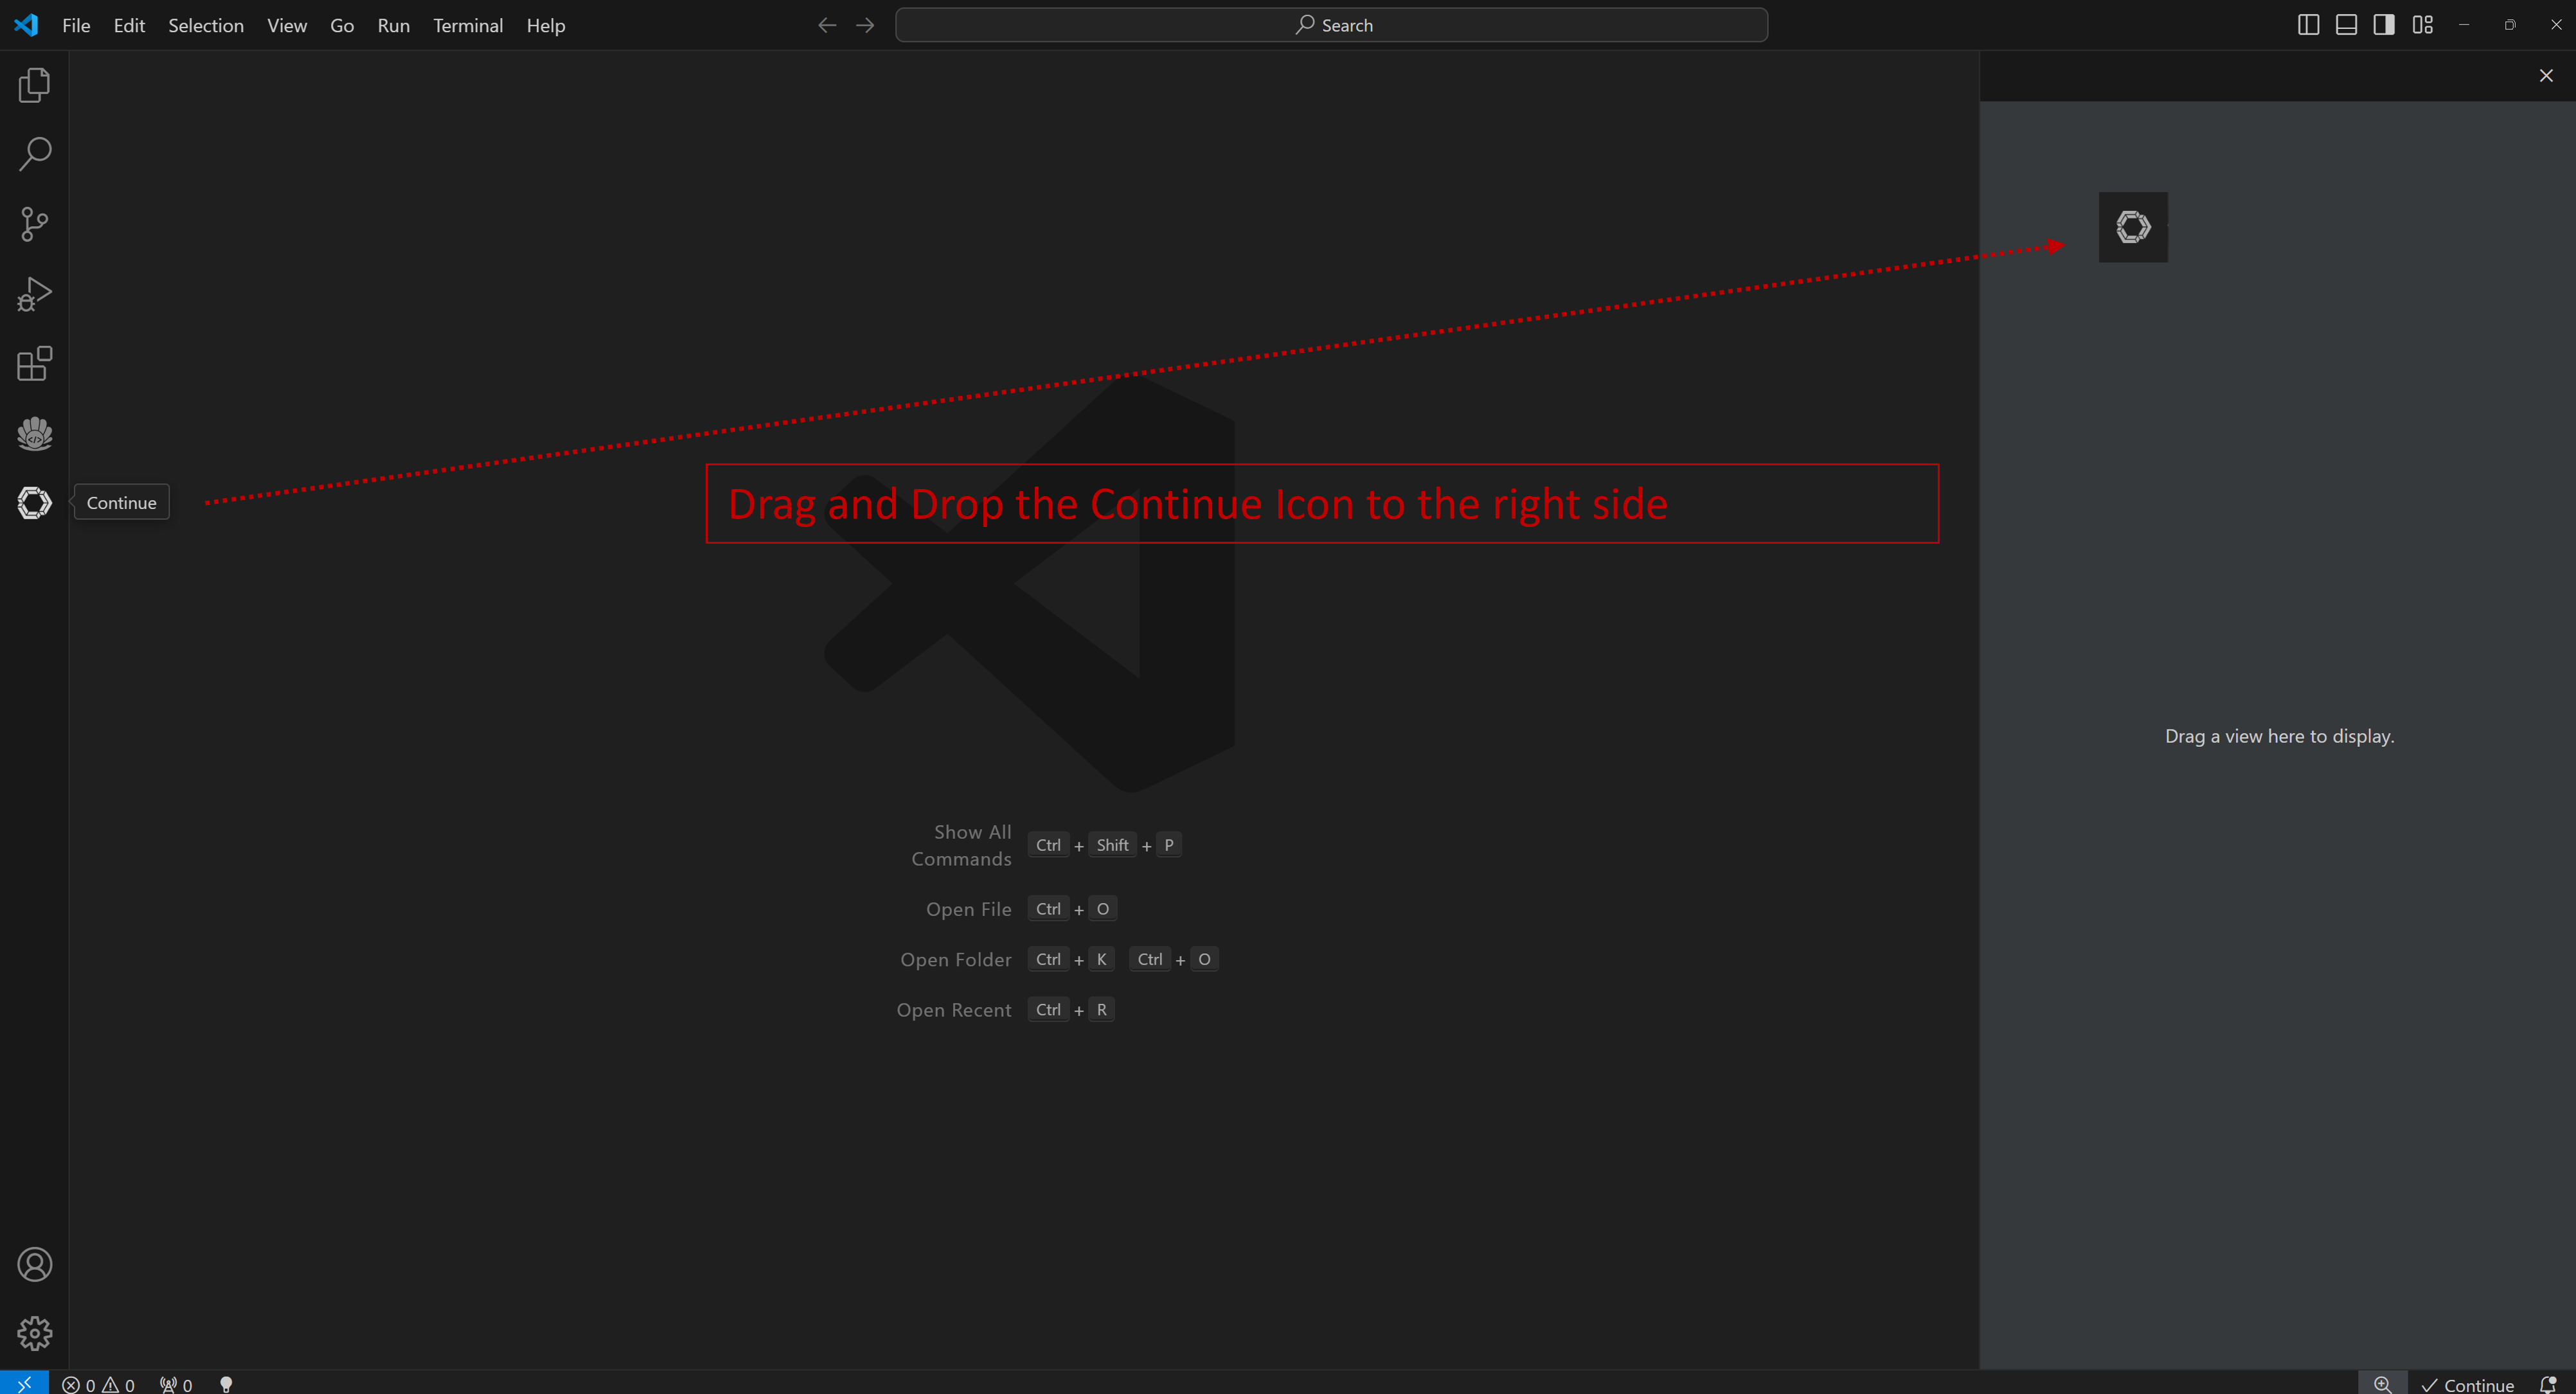
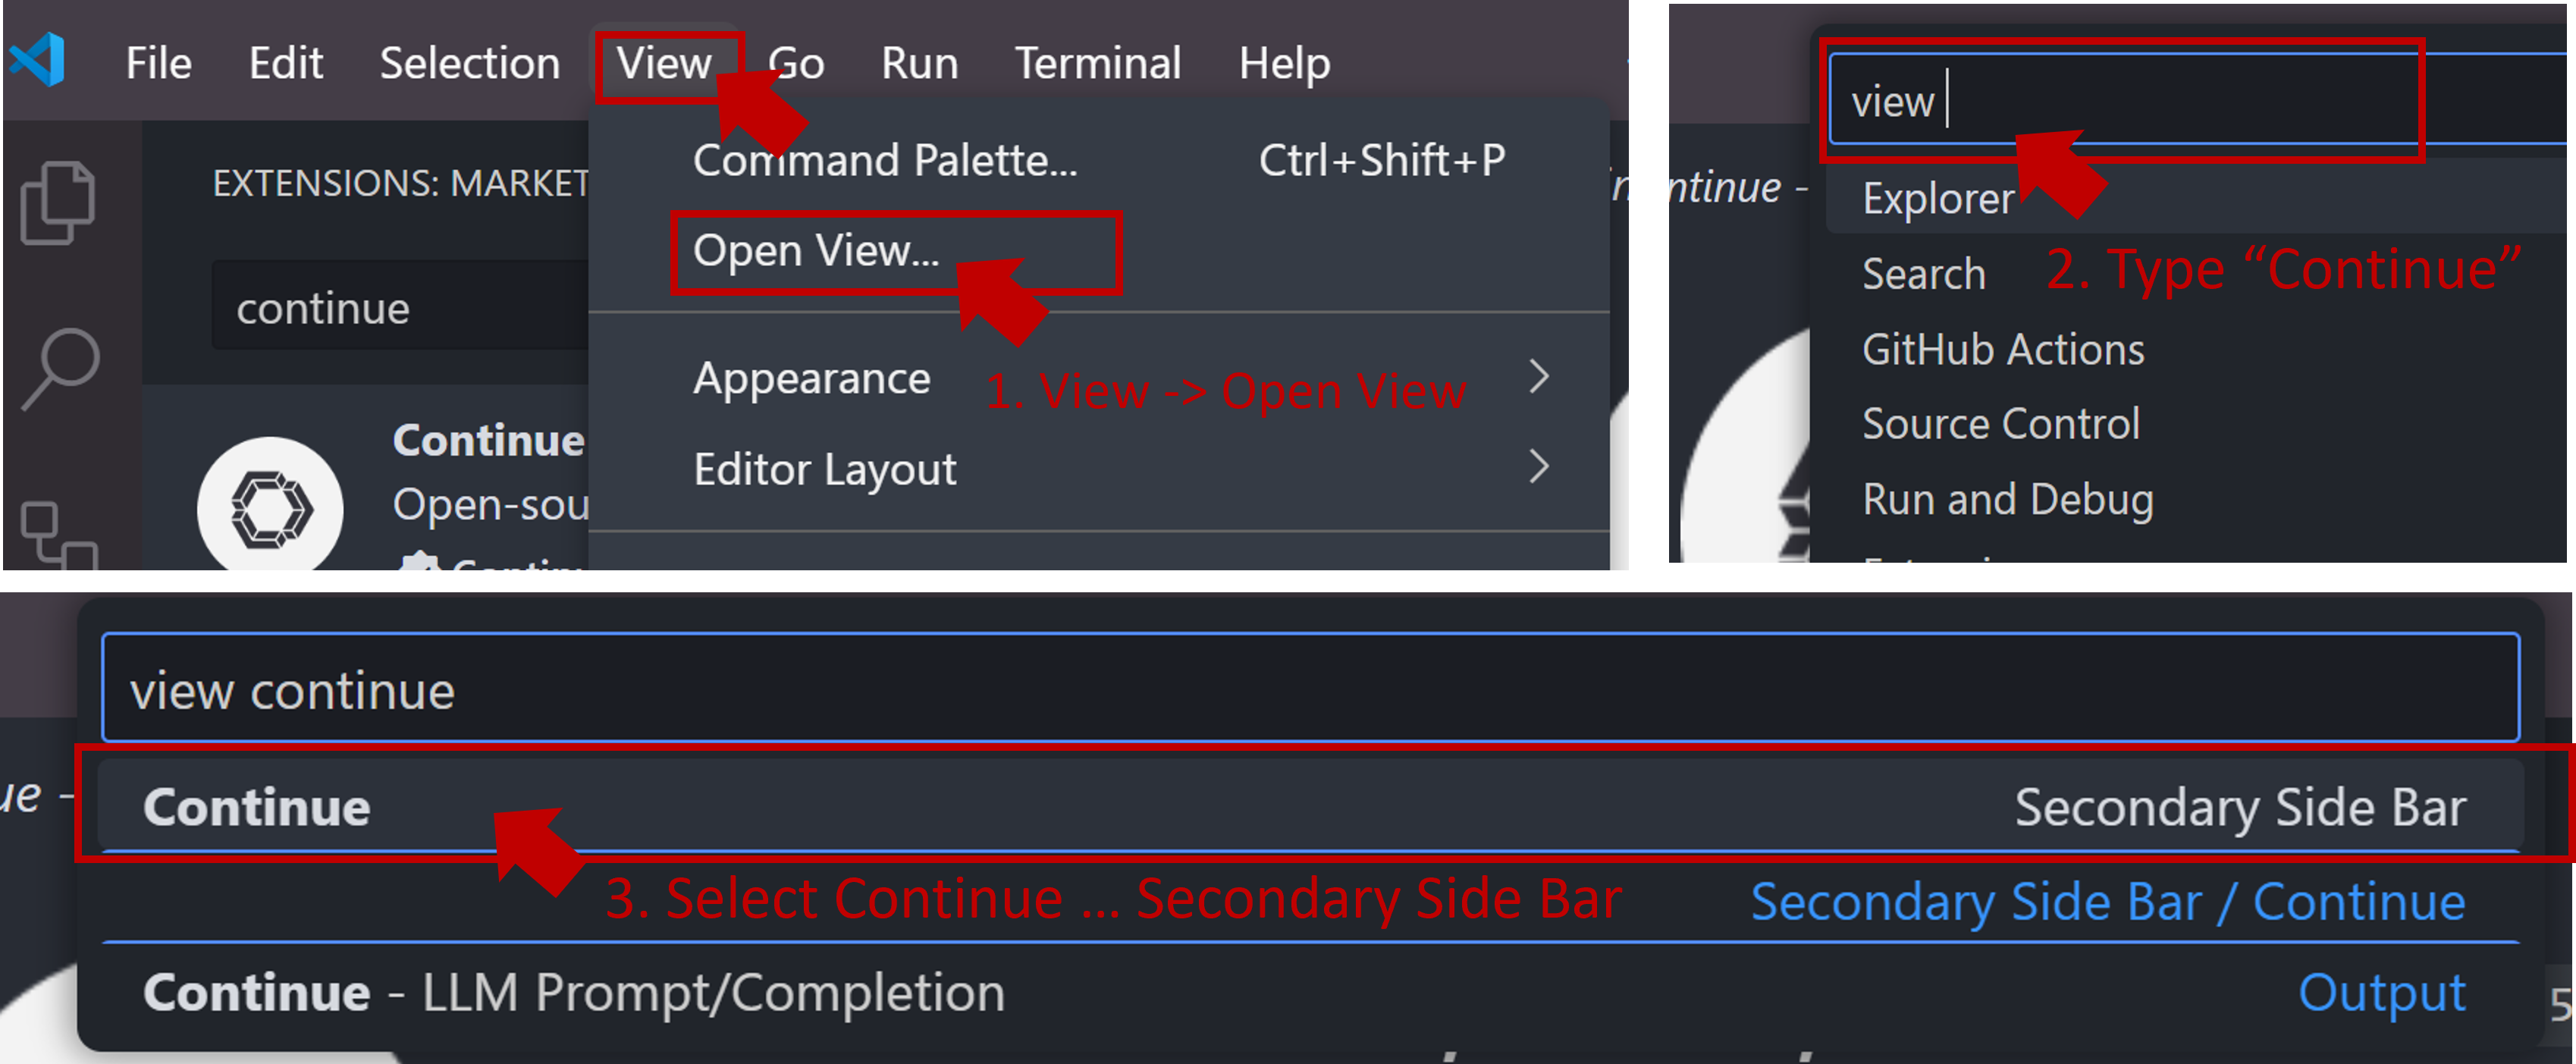
If the icon does not appear or you cannot open the view, press Ctrl+Shift+L or follow the steps below to open the Continue view on the right side.
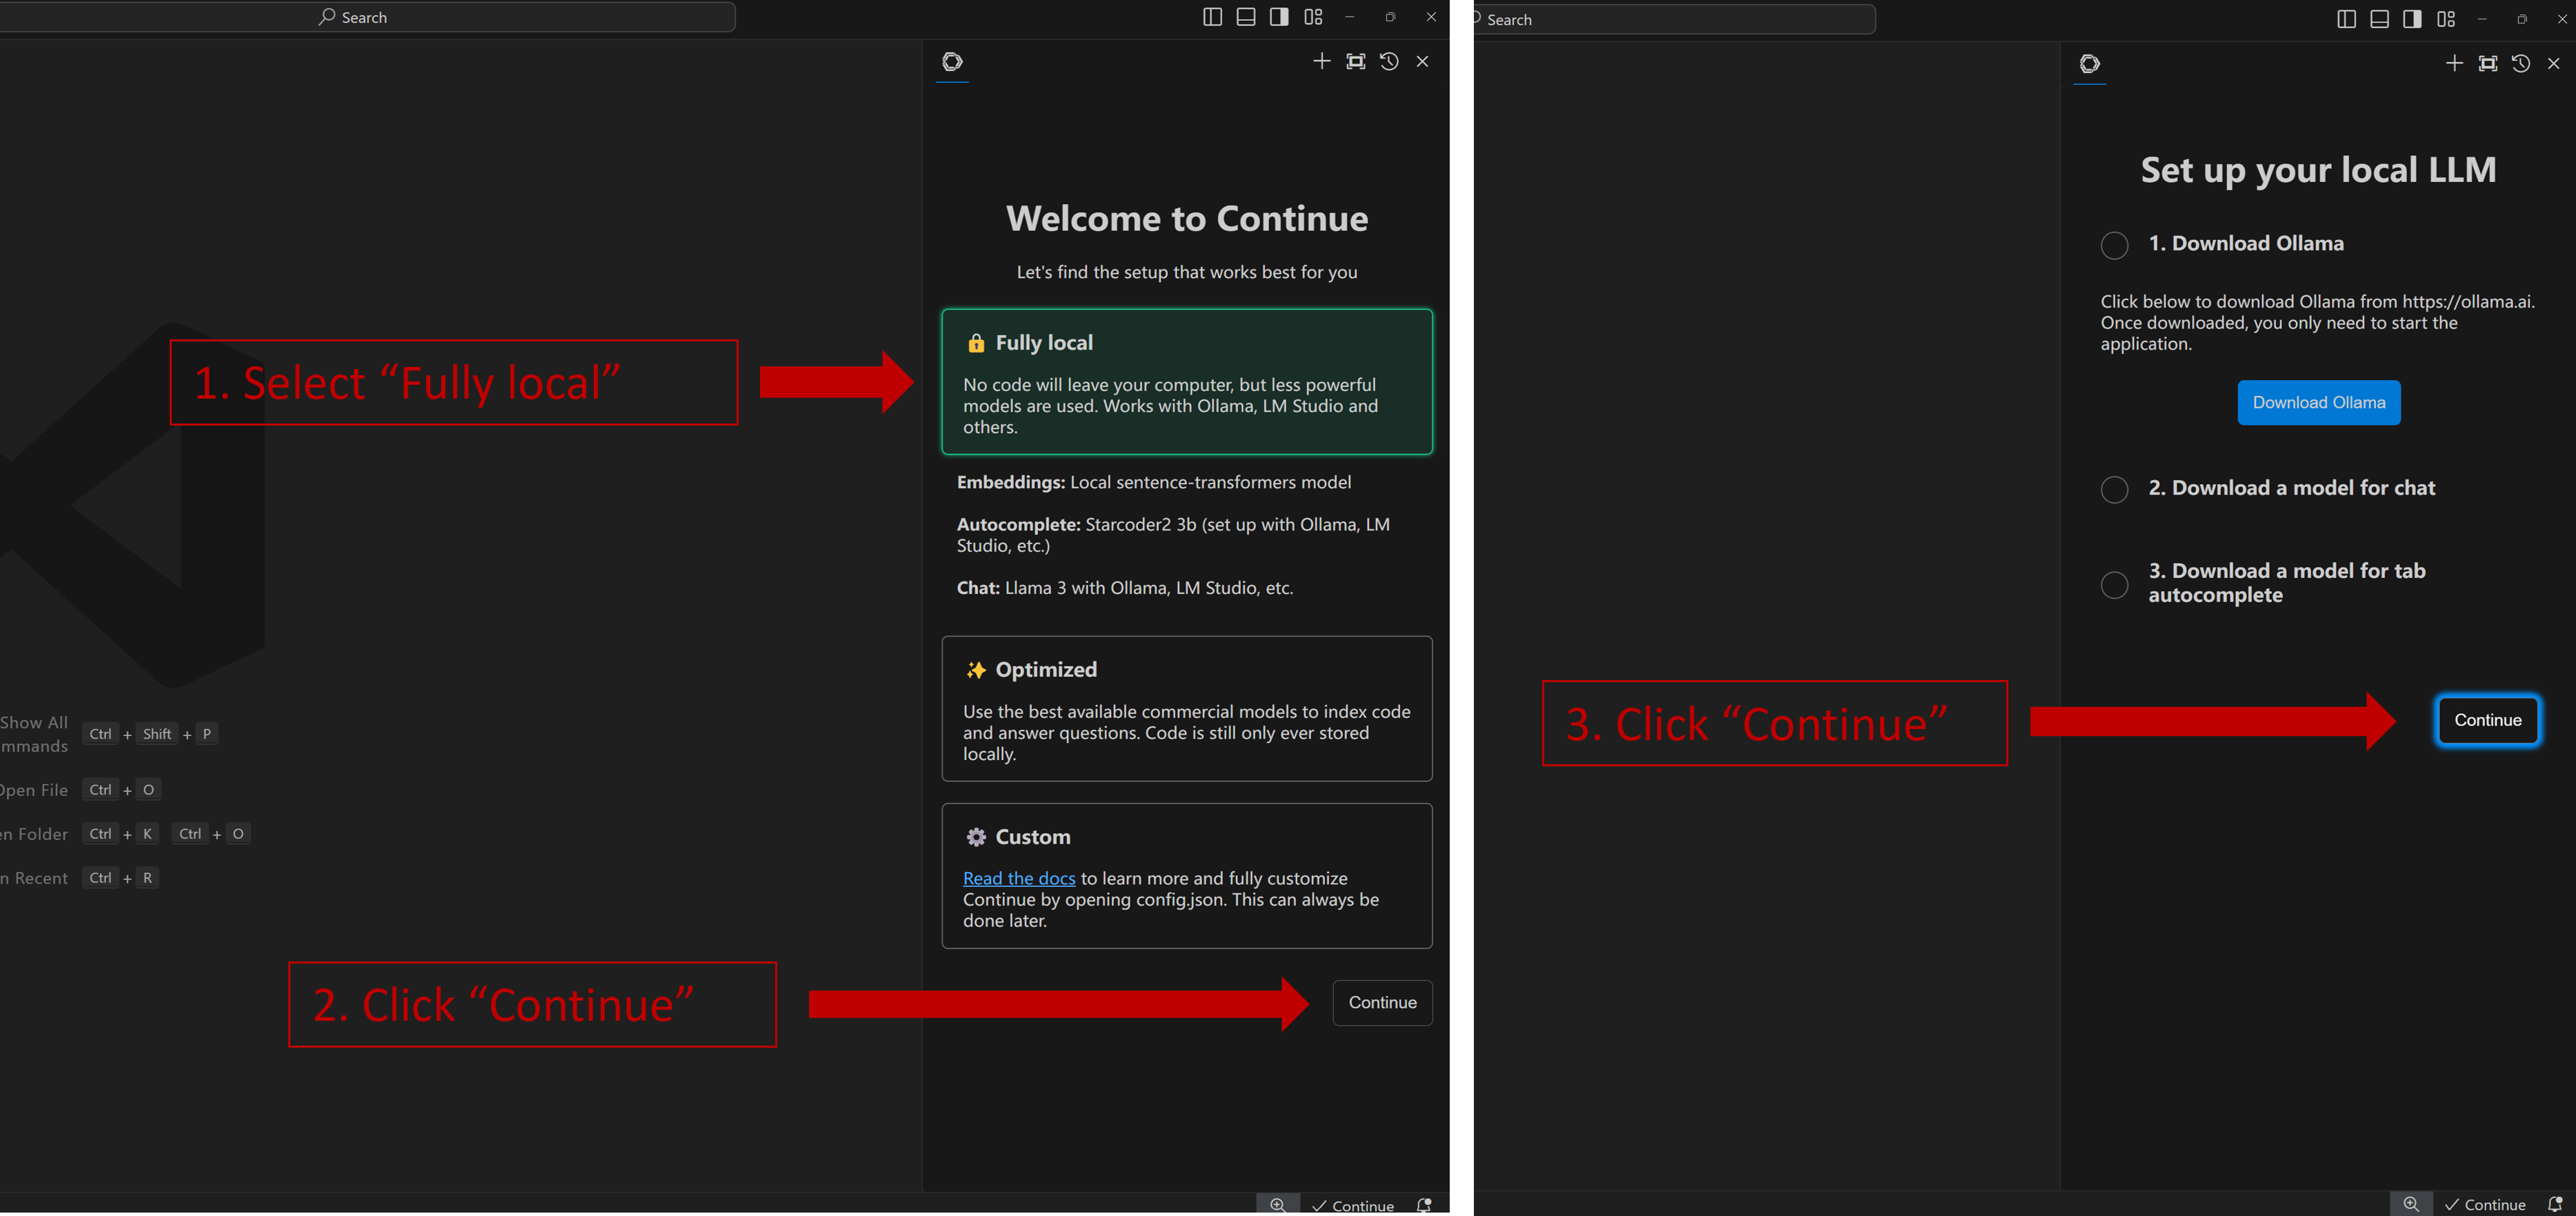
Once you have successfully opened the Continue view, you will see the welcome screen as shown below. Select Fully local -> Continue -> Continue as illustrated.
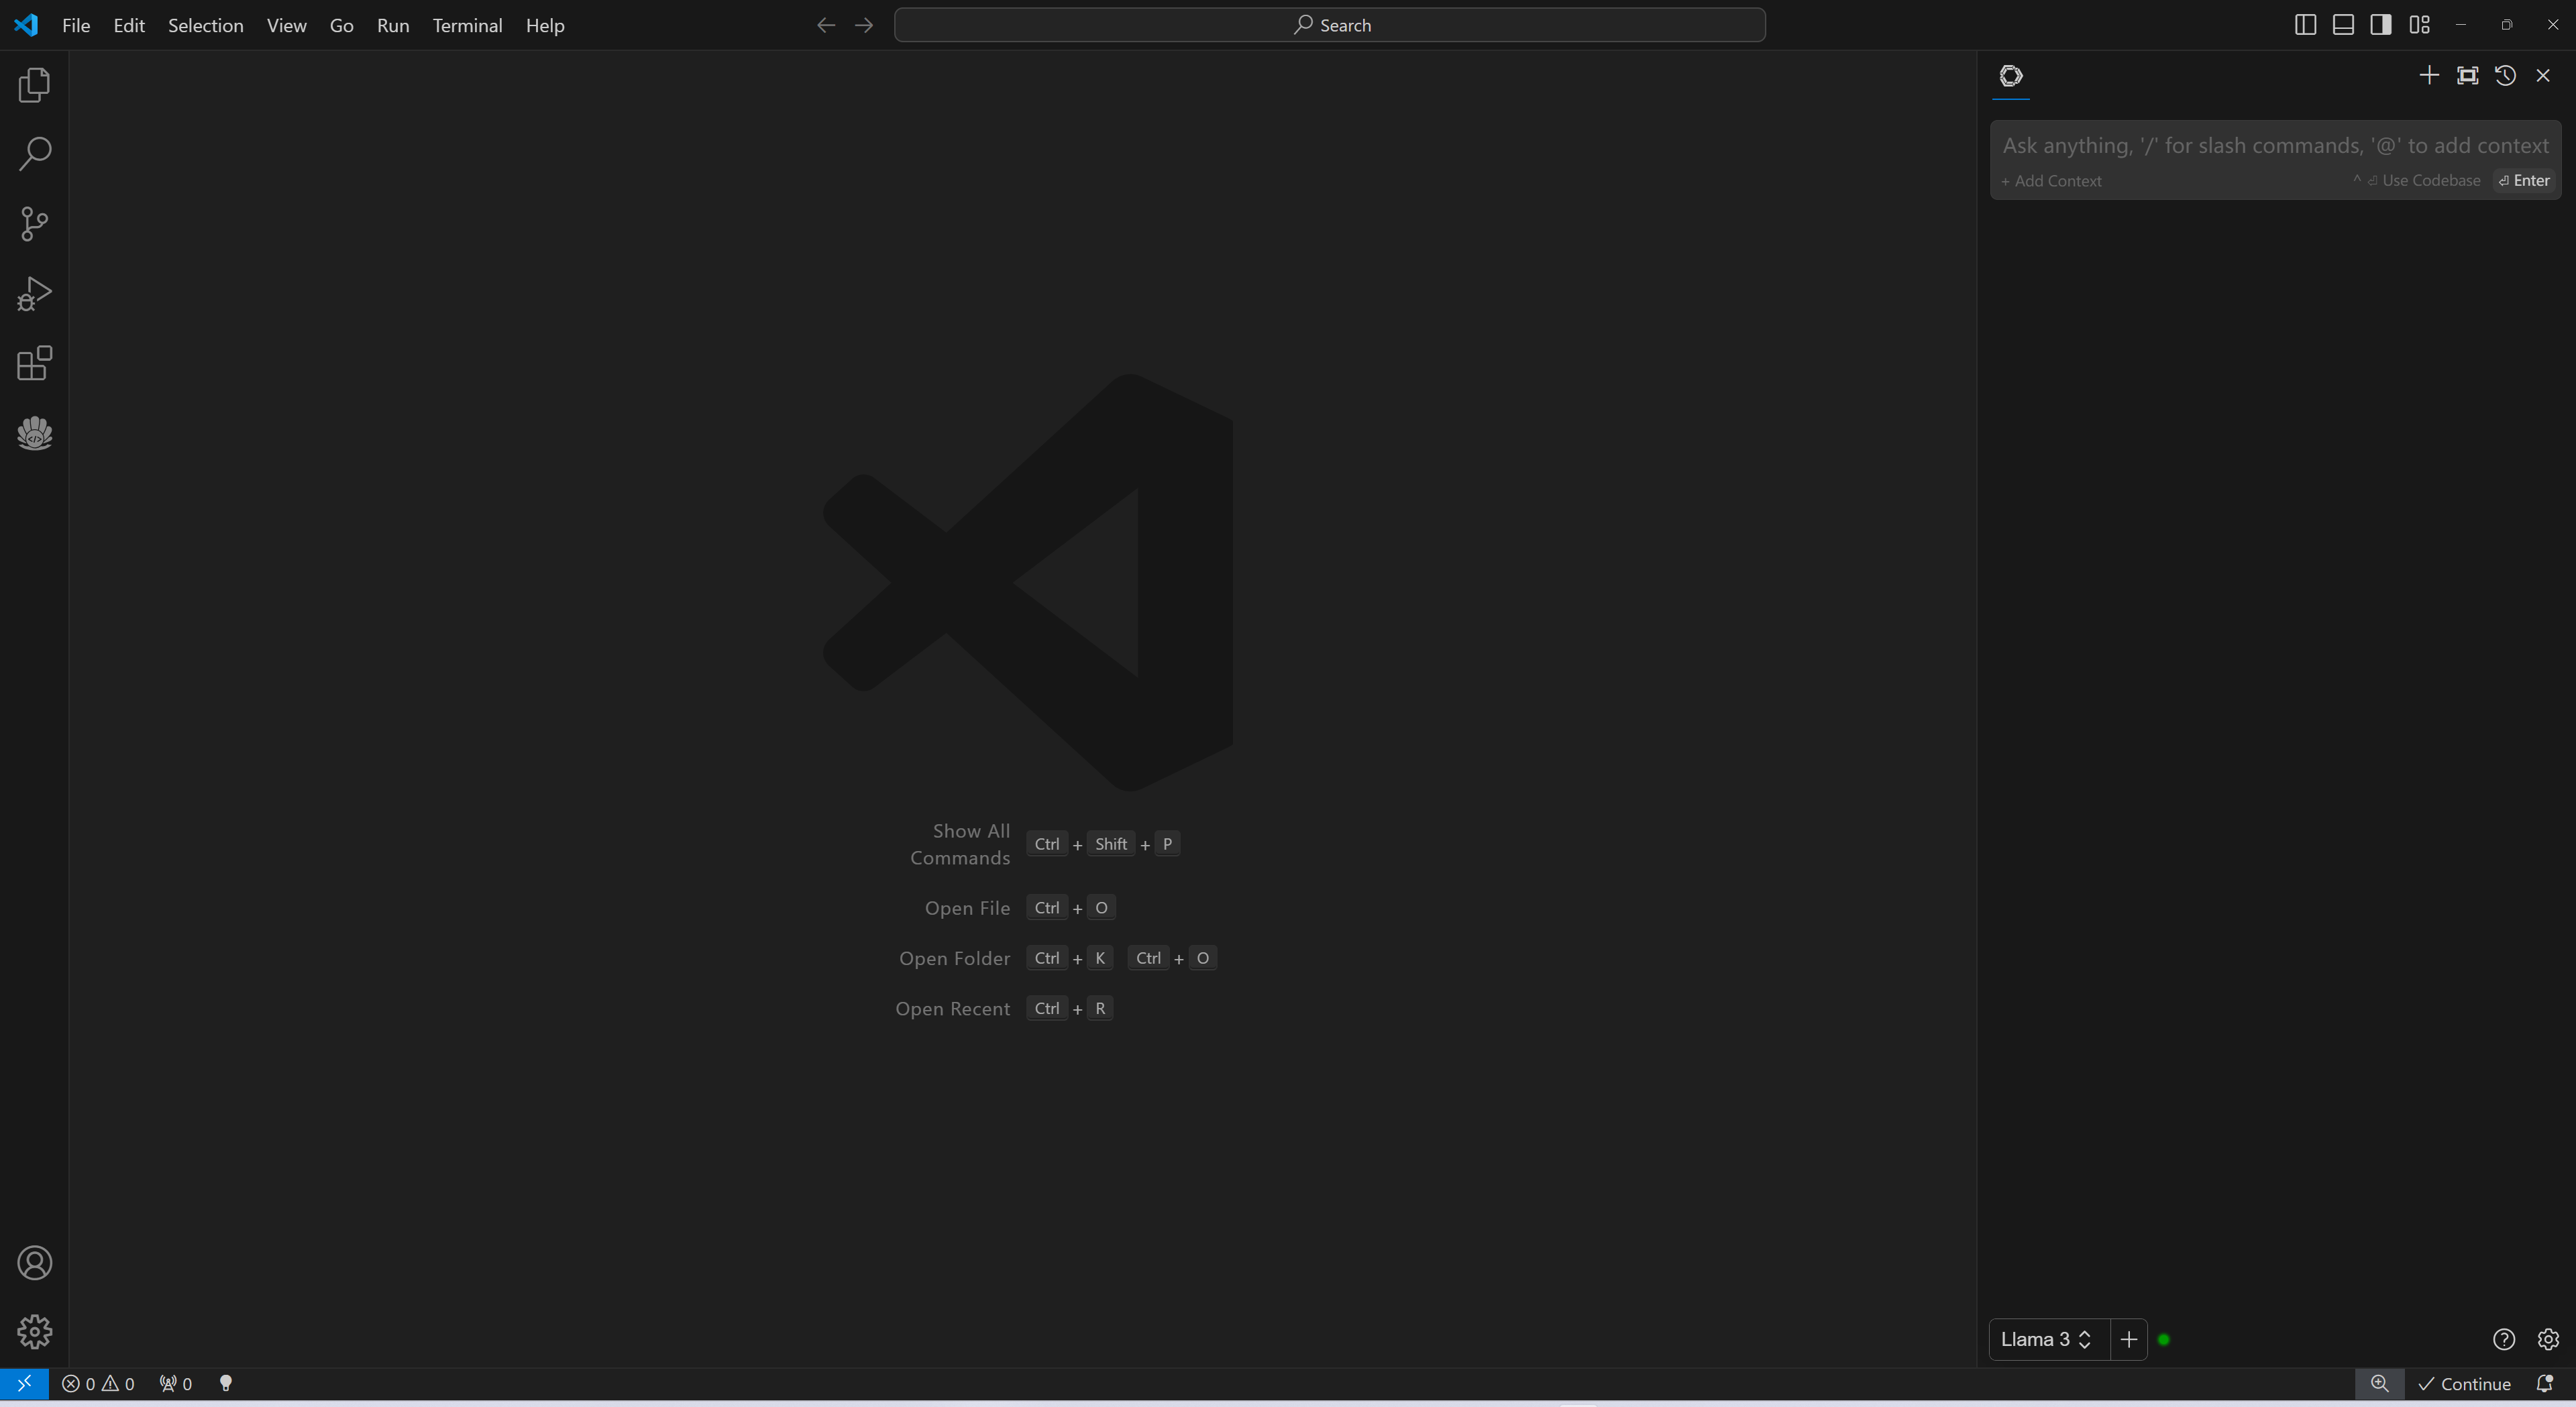
When you see the screen below, your plug-in is ready to use.
4. Continue Configuration#
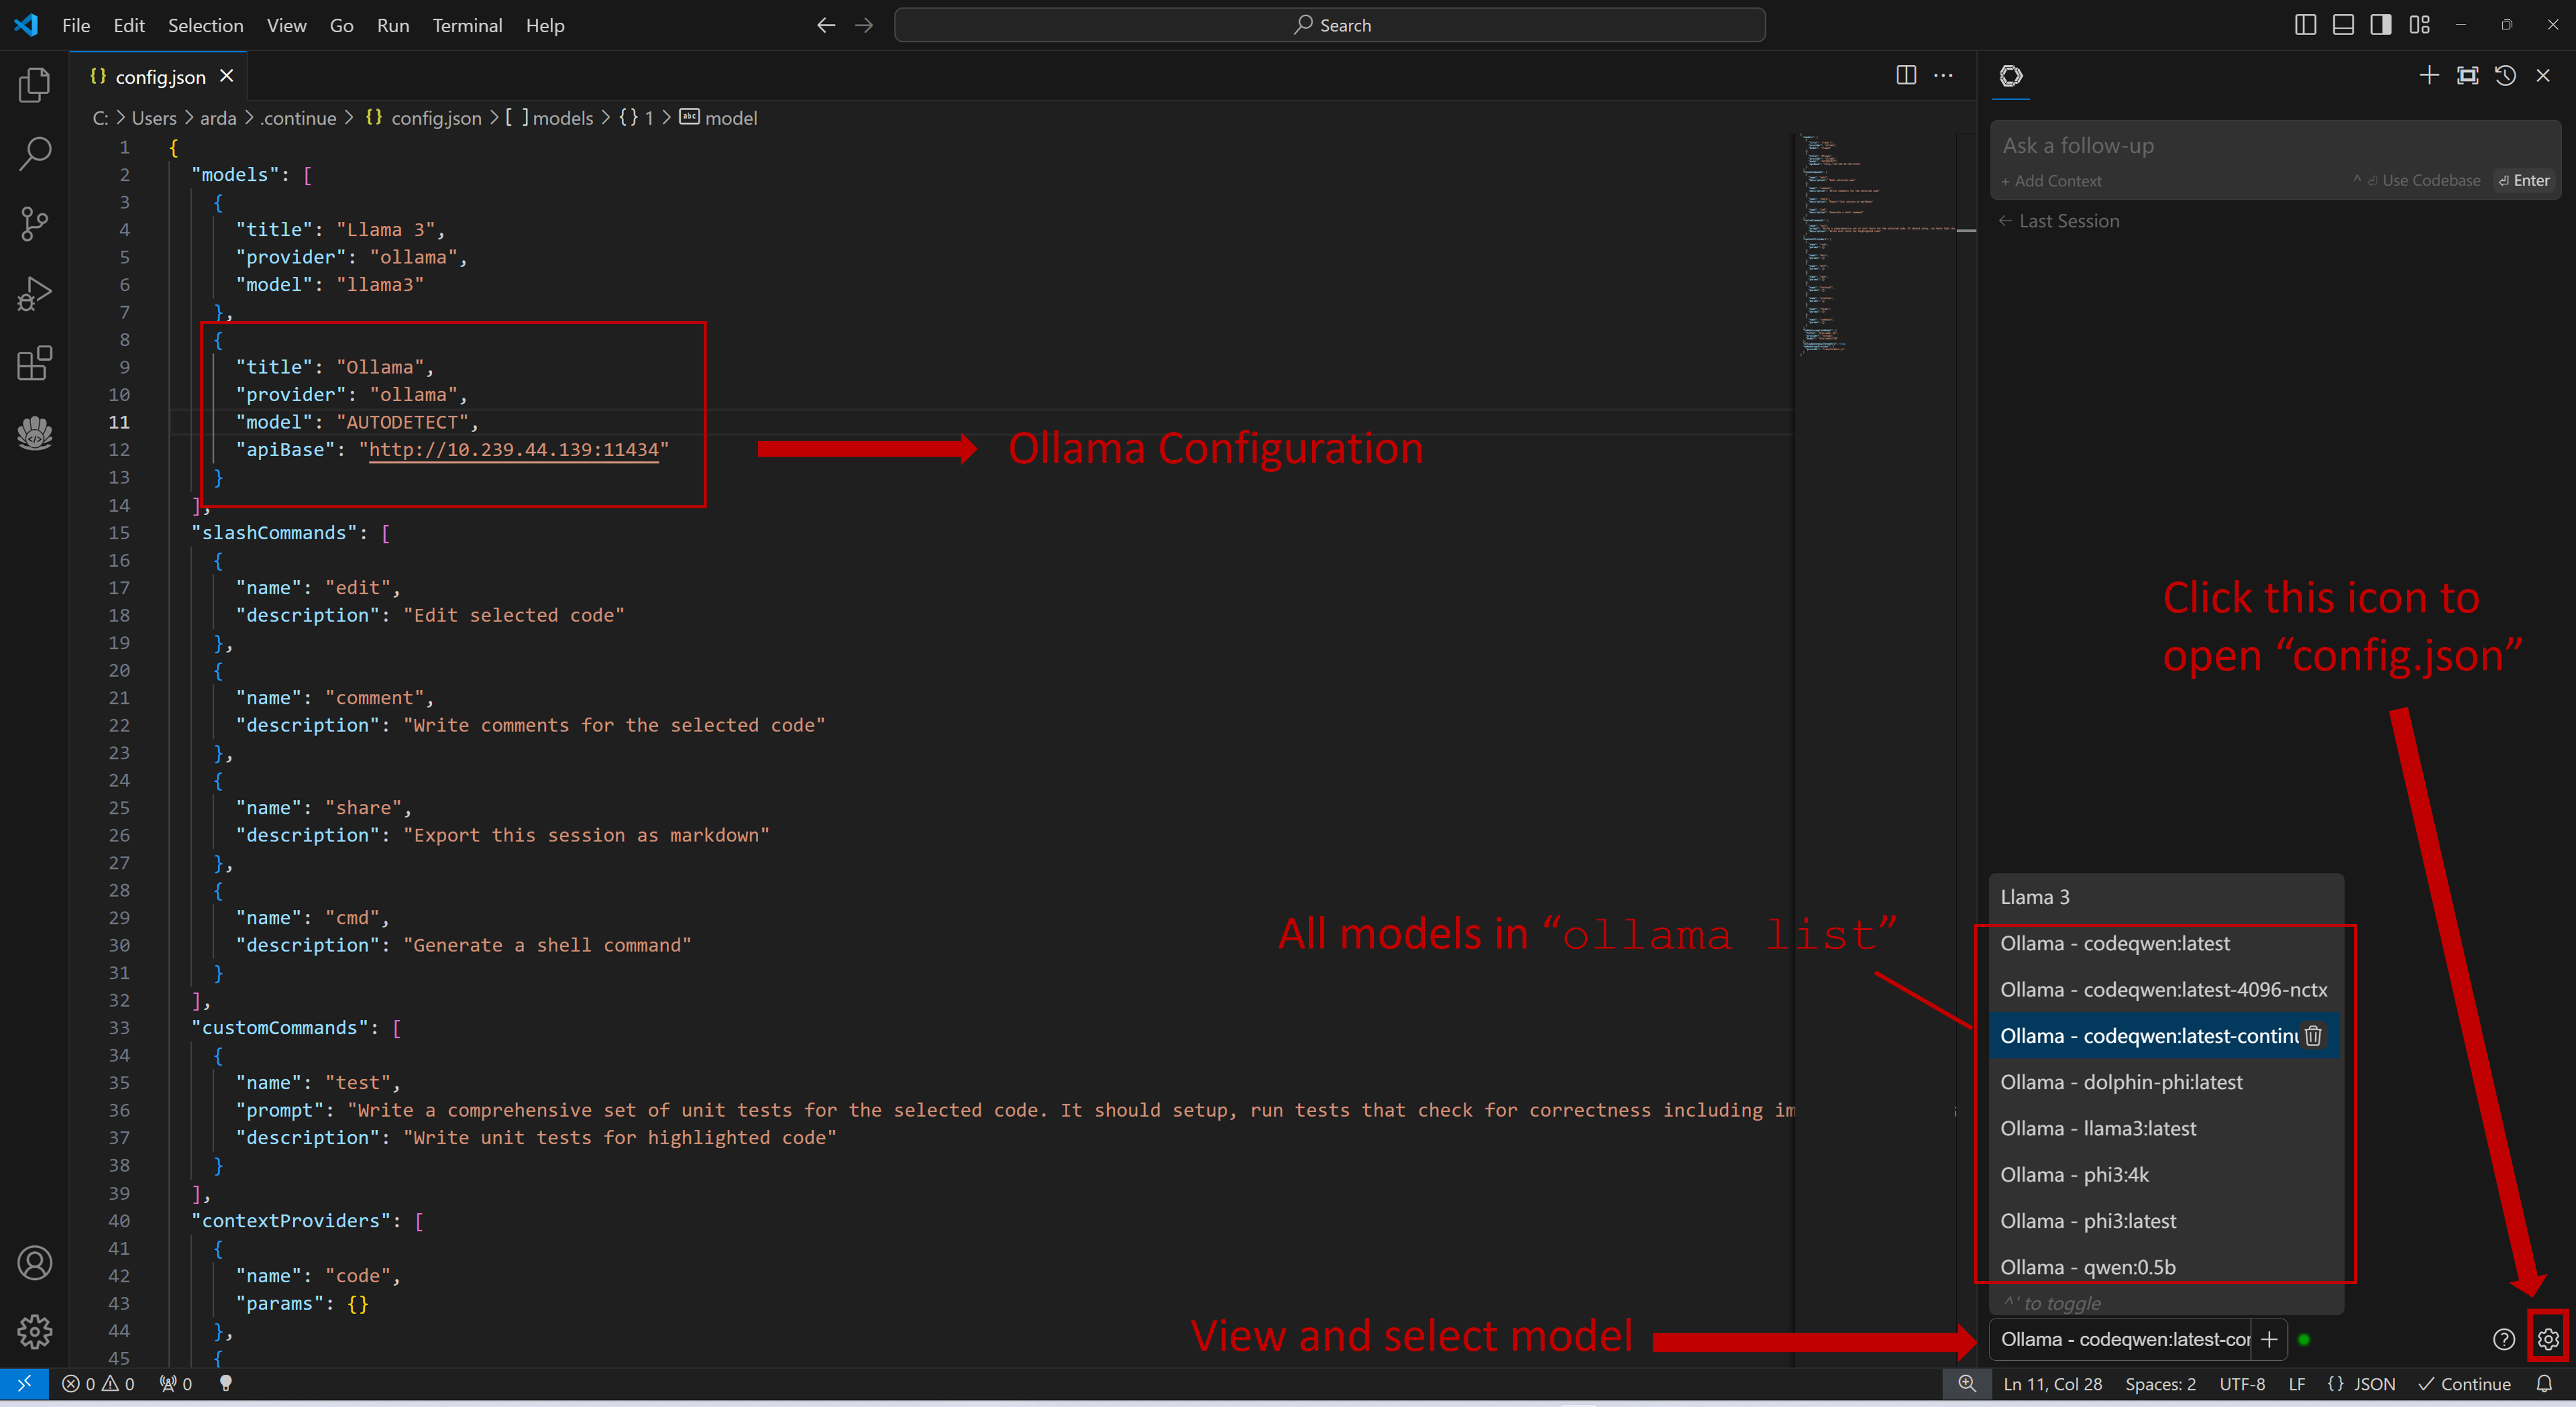
Once Continue is installed and ready, simply select the model “Ollama - codeqwen:latest-continue” from the bottom of the Continue view (all models in ollama list will appear in the format Ollama-xxx).
Now you can start using Continue.
Connecting to Remote Ollama Service#
You can configure Continue by clicking the small gear icon located at the bottom right of the Continue view to open config.json. In config.json, you will find all necessary configuration settings.
If you are running Ollama on the same machine as Continue, no changes are necessary. If Ollama is running on a different machine, you’ll need to update the apiBase key in Ollama item in config.json to point to the remote Ollama URL, as shown in the example below and in the figure.
    {
      "title": "Ollama",
      "provider": "ollama",
      "model": "AUTODETECT",
      "apiBase": "http://your-ollama-service-ip:11434"
    }
5. How to Use Continue#
For detailed tutorials please refer to this link. Here we are only showing the most common scenarios.
Q&A over specific code#
If you don’t understand how some code works, highlight(press Ctrl+Shift+L) it and ask “how does this code work?”

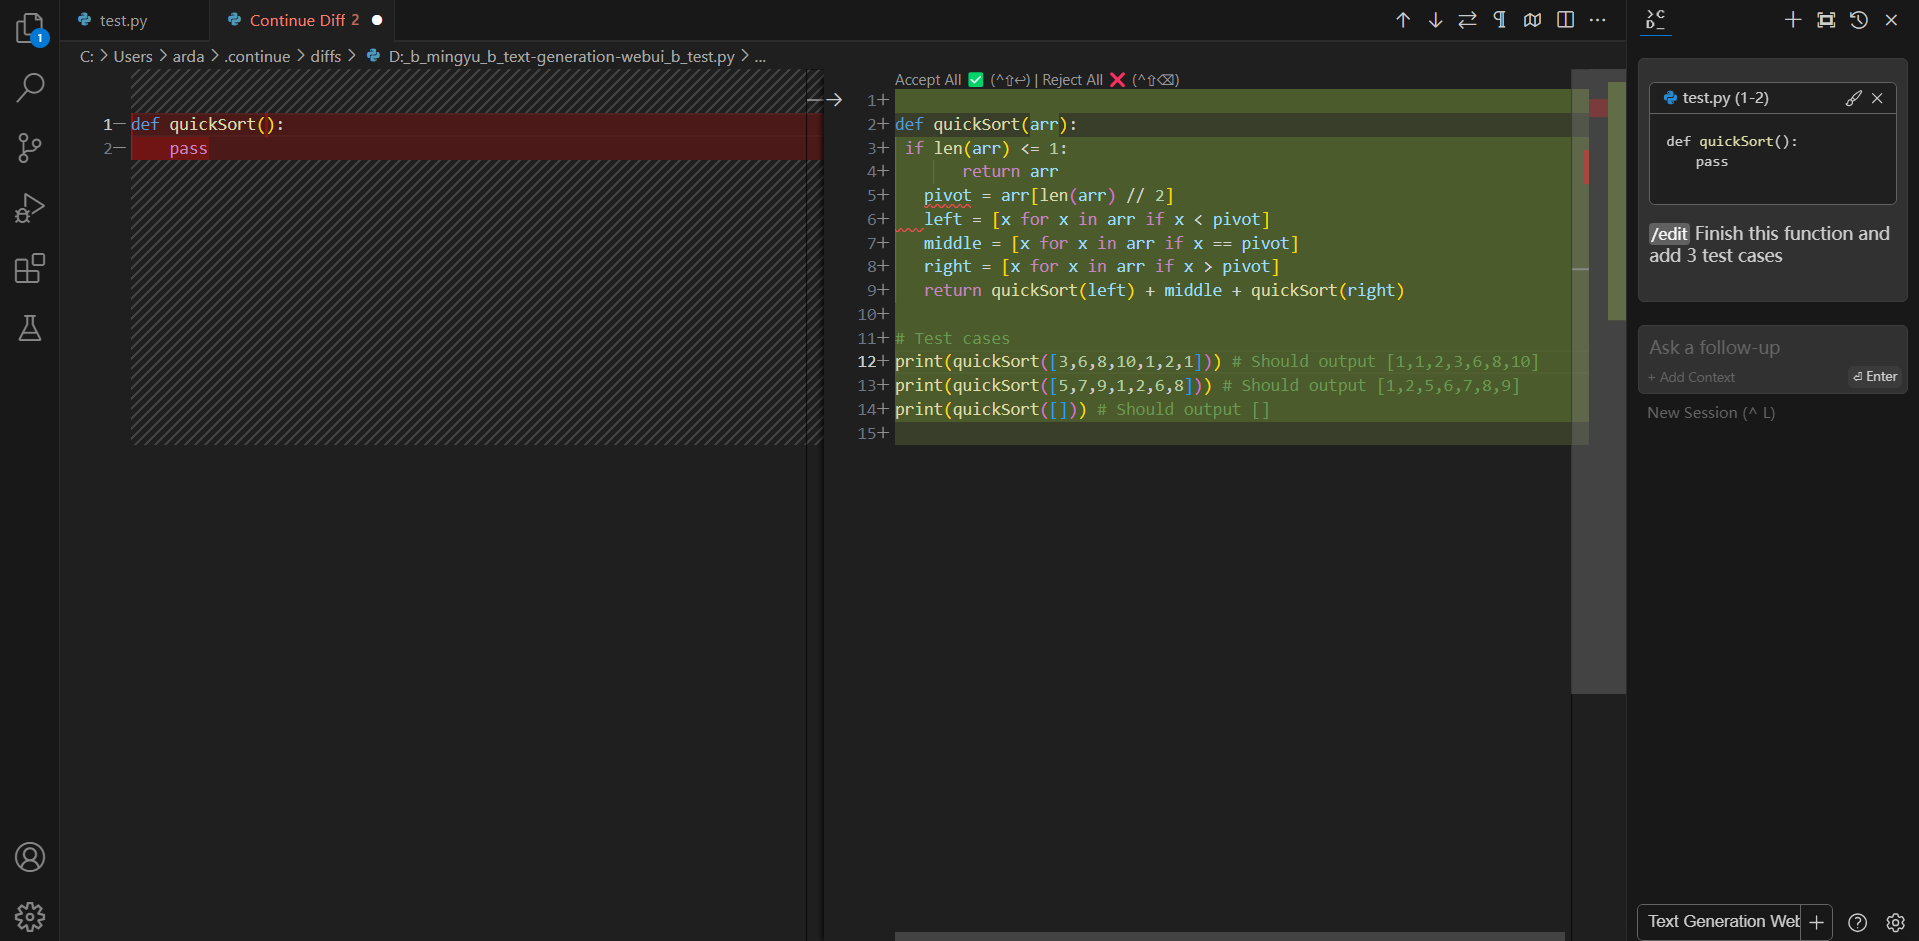
Editing code#
You can ask Continue to edit your highlighted code with the command /edit.